Showing posts with label craft. Show all posts

Saturday, March 21, 2015

The Best Craft Ever!

Yes! It is the best craft ever...
On a plane, in a train... Even on a day of rain!!! Lol:)

All you need is a bag of fruity tootsie rolls and a few chocolate tootsie rolls and some imagination!
Open the candy... Roll it in your hands to warm it and craft away!

Best part? Clean up is snack time! 
If you want to take things to the next level you can always use cute polymer clay moulds and add these to the top of cupcakes! You can also roll out the tootsies and use cookie cutters to cut out edible shapes for cakes! Be sure to dust a bit of powdered sugar to surfaces and mould so it won't stick!

Have fun being the mom, auntie, or teacher of the year! They will love this craft!
Have a glorious day!
All my best,
Celeste xo

Sunday, December 28, 2014

Charging into the new year!

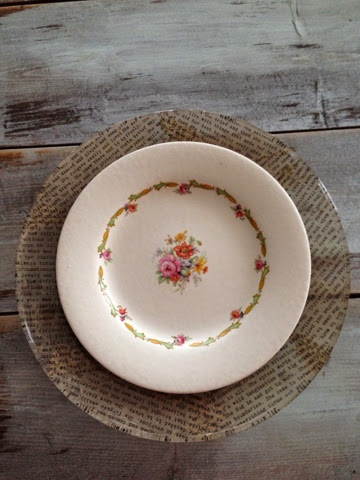
I'm always looking for ways to feature my grandmothers dishes and make them even more beautiful! Today I found something that made me jump for joy! I use to do hand painting of the back of glass plates but I had never decoupaged a glass plate until today. I bought this fabulous tissue months ago, and finally found this awesome project to use it in!
I used gloss Mod Podge because that's what I had. I would recommend a matte finish. Tear the paper so it has raw edges, apply the Mod Podge on the back of the glass, place pieces on the glass and Mod Podge over top. Try not to overlap too much and let dry! That's it! You can spray seal the back after it's completely dry. To clean use a damp cloth on the top only.
Enjoy! 
Celeste XO

Tuesday, April 22, 2014

Happy Earth-day!

Happy Earth-day!
Today in our studio we are celebrating earth-day!
Along with learning about the earth and how we can care for it better, we are making earth-day cupcakes!
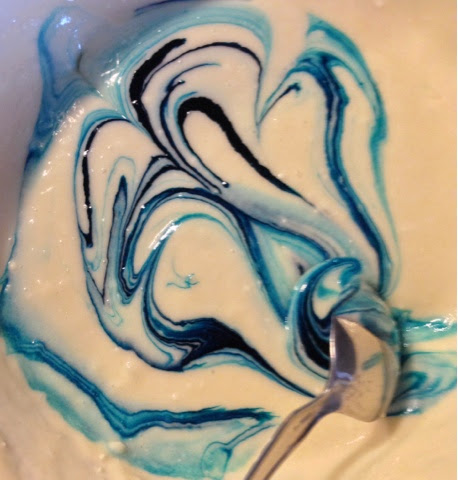
We are having "studio days" so we mixed up our cake batter... Any light colored batter will do. We divided our batter into two bowls.
The blue: added about four drops of coloring.
Then the green: about four drops of color. Swirled them with a toothpick. We used a ice cream scoop to fill our cups. Alternating each color.
Sarah was the best helper and was so excited to see how they would come out! She said "They look like the world and smell like heaven!"
We doubled our cupcake liners and also pre-heated the oven to 350 but baked them at 325 so they would have puffy tops!
We hope you will try our fun earth-day cupcakes and do something to make this world a better place!
Enjoy this glorious day!
Xo
Celeste ❤️


Tuesday, August 13, 2013

You can make this!

So I have had these frames for a year or so. I get a little carried away in the craft store and go in for one thing to finish a project and come out with three new project ideas. I affectionately call myself "hyper-creative". So being that I am a jewelry designer first and foremost, I have tons of rings. I am also an artist and love multi-functional decor. What better way to display rings than cute frames that make your jewelry a piece of art! So here we go!


Supplies:
Glue sticks and gun
Spray paint (color of your choice)
Scissors
Felt (color of your choice)
Frame

To start, fire up your gun so it starts to melt your glue. Keep a few extra sticks of glue close by so you can keep moving along as the cool melt glue tends to harden quick.
While your gun heats up head outside and spray your frame the color of your choice and let dry.
The felt usually comes in an 8x10 pieces. I used half of those sheets. So three-and-a-half full sheets. Roll your felt into tubes as tight as you can and drop a bead of glue in a line to secure your felt tube. Make enough tubes until the fill the opening in your frame, I used seven. Measure and trim if you need to so that the tubes hang over on the backside and don't fall through the front. Glue the tubes just to the outside of the frame. Don't glue them together or you won't be able to push your rings in:)


Mine lays flat on my table but if you would like, attach a pretty ribbon with your hot glue and hang it or cut a paint stirrer in half and glue it as a kick stand on the back to stand it up!

Just a few other things you will find in our pretty little beach shop at celeste m. designs:

Aqua bow coin purse with brooch:


Zebra-print coin purse with brooch:
Sweet French-market style match boxes you will be proud to keep out on your coffee table.
(candles to come...)


I hope you have fun making this quick ring holder!
Enjoy this glorious day!
Xo
Celeste

Celestemarie25@yahoo.com