Showing posts with label DIY. Show all posts

Tuesday, April 22, 2014

Happy Earth-day!

Happy Earth-day!
Today in our studio we are celebrating earth-day!
Along with learning about the earth and how we can care for it better, we are making earth-day cupcakes!
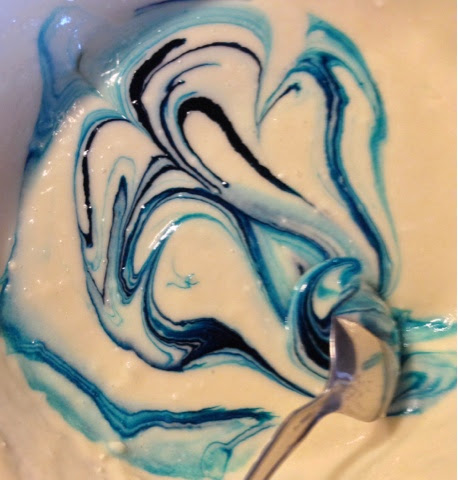
We are having "studio days" so we mixed up our cake batter... Any light colored batter will do. We divided our batter into two bowls.
The blue: added about four drops of coloring.
Then the green: about four drops of color. Swirled them with a toothpick. We used a ice cream scoop to fill our cups. Alternating each color.
Sarah was the best helper and was so excited to see how they would come out! She said "They look like the world and smell like heaven!"
We doubled our cupcake liners and also pre-heated the oven to 350 but baked them at 325 so they would have puffy tops!
We hope you will try our fun earth-day cupcakes and do something to make this world a better place!
Enjoy this glorious day!
Xo
Celeste ❤️


Tuesday, March 4, 2014

We love little ones, but they grow up too fast!

Thats exactly why we have started our "Studio Days" the innocence in their art, the hilarious things they say and just the way they see the world makes us so happy! Plus it gives Mom and Dad a good break for some "us" time! Or just Mom a chance to get some errands done!
Meet Isola!
She is the sweetest peach and was our guest in studio today! She got to pick from a list of things geared towards her style and interests to do in studio today! First she pick from our Pandora playlist. She came up with some Hawaian music as our sound track for our day! Perfect!
Girl after my own heart! Jack!!!

Then we picked out not one but five colors of posh polish for her mani-pedi that she chose from our list of fun! She called the shots on how this was going down and I loved it!
She went with ballet pink on her toes to balance the disco style on her mani! She knows a girls nails should never match her pedi! That's a Vouge #101 rule! Duh!
While her nails dried she decided that the next choice was watercolors! 
She explained to me how the rule is, you have to get all the paints wet first. And then she was off making a beautiful masterpiece that we think is a framer and  her Mom agreed! 
Next a break to pet Mr. Snuggles who was very curious about our studio guest then off to the table to pick beads for our lesson on jewelry making!
She loved my pearls with my initial so we picked out her letter and her favorite color beads! Next we got to work! She worked hard and strung all the beads with only a bit of help from me... Than she said it... Those priceless things kids say! "You know Miss Celeste something's are very hard, but if you work hard at it, it's worth it!" How smart is she! I said "Yes, that is so true Isola!" Thinking to myself, it's amazing that she knows this when some grown-ups have no clue about life.
She did so good at stringing beads!
And finally we headed into our cozy kitchen to decorate some gourmet rice Krispy treats! First she picked out a custom chocolate color to match her hoodie! This girls got style! Then she picked four different shakers of sprinkles... We had a lot to choose from!
She learn how chocolate has to get warm to melt and cool to harden. Also how when you sprinkle high up the sprinkles go on light and when you sprinkle low they go on heavier and darker.
Then came the best part... Cutting and eating our treats!

We had such a great day! 

Now the only question was: When does she get to come back!
You did great Isola and you are welcome back anytime!
XO
Celeste

to book your childs "Studio Day!" email celestemarie25@yahoo.com or text/call 216-406-1523 We are in the Cleveland Ohio area in Westlake!

www.celestem.com


Tuesday, August 13, 2013

You can make this!

So I have had these frames for a year or so. I get a little carried away in the craft store and go in for one thing to finish a project and come out with three new project ideas. I affectionately call myself "hyper-creative". So being that I am a jewelry designer first and foremost, I have tons of rings. I am also an artist and love multi-functional decor. What better way to display rings than cute frames that make your jewelry a piece of art! So here we go!


Supplies:
Glue sticks and gun
Spray paint (color of your choice)
Scissors
Felt (color of your choice)
Frame

To start, fire up your gun so it starts to melt your glue. Keep a few extra sticks of glue close by so you can keep moving along as the cool melt glue tends to harden quick.
While your gun heats up head outside and spray your frame the color of your choice and let dry.
The felt usually comes in an 8x10 pieces. I used half of those sheets. So three-and-a-half full sheets. Roll your felt into tubes as tight as you can and drop a bead of glue in a line to secure your felt tube. Make enough tubes until the fill the opening in your frame, I used seven. Measure and trim if you need to so that the tubes hang over on the backside and don't fall through the front. Glue the tubes just to the outside of the frame. Don't glue them together or you won't be able to push your rings in:)


Mine lays flat on my table but if you would like, attach a pretty ribbon with your hot glue and hang it or cut a paint stirrer in half and glue it as a kick stand on the back to stand it up!

Just a few other things you will find in our pretty little beach shop at celeste m. designs:

Aqua bow coin purse with brooch:


Zebra-print coin purse with brooch:
Sweet French-market style match boxes you will be proud to keep out on your coffee table.
(candles to come...)


I hope you have fun making this quick ring holder!
Enjoy this glorious day!
Xo
Celeste

Celestemarie25@yahoo.com